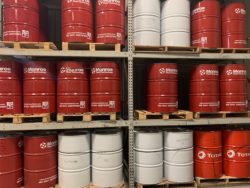
How Long is Lubricant’s Shelf Life?

When buying lubricants, you have to consider how long they will last. For high-volume users, this is not as much of an issue compared to smaller-volume users. High-volume users’ regularly consumer and reorder lubricants and typically have systems in place to monitor usage and spending. Small-volume users might be spread a drum or two of a lubricant through the course of a year. When consumption is spread out, you have to start to consider shelf-life into your purchasing decisions and operational processes.

Where can I find Shelf-Life Information?

Table made by George Wills and Dr. A.R. Landsdown

Information on a lubricant’s shelf life can be found on a technical or safety data sheet. If it is no t clearly defined, manufacturers and distributors can provide guidance on shelf life for its products. However, this information might be based on storage only or based on typical operations. George Wills and Dr. A.R. Landsdown provide a brief list of lubricants and their shelf-lives for products that have shorter shelf-lives.

Some technical data sheets (TDS) can show how long a lubricant can last in use before losing oxidation stability. This is measured in operating hours. Most oxidation tests will show a lubricant can last 5000+, 8000+, 10000+, etc. hours. However, like all scientific tests, this is done in a controlled environment (usually set by ISO or ASTM standards and specifications). We know that not every operating environment is like an ASTM or ISO test.

What Determines a Lubricant’s Shelf Life?

A lubricant’s shelf life depends on a variety of factors; some of which depend on the lubricant itself and some depend on usage. Greases have much shorter shelf life due to the presence of thickeners than oil-based lubricants. Highly-refined and synthetic oils have longer shelf lives due to better molecular stability. This is much more straight-forward and lubricant suppliers can inform you which lubricants last longer than others.

Using a lubricant is different for each operation. Some operations happen at low temperatures, others occur at high temperatures. The Arrhenius rate is a chemistry term that demonstrates how chemical reactions increase by changing temperature. For lubricants, as temperature increases by 10°C (18°F), the oxidation rate will double. The more oxidation that occurs, the faster a lubricant will break down and reduce the shelf life and effective use life.

Machinery Lubrication compiled a chart from its experts to show what can increase or decrease a lubricants shelf life.

Table Courtesy of Noria Corporation and Machinery Lubrication


How can you Reduce Oxidation?

Oxidation occurs when the lubricant comes into contact with air. Certain lubricants are more susceptible to faster oxidation and degradation due to the composition of the lubricant. However, these are known and can be accounted for, whereas human factors are a much greater influence on degradation and chemical stability.

Storage is key to maintain longer shelf-life and higher lubricant performance. Some things that can improve shelf-life include:

  • Storing lubricants in proper ambient temperatures. Cooler temperatures around 68°F are ideal.
  • Storing lubricants in dryer environments. Ambient humidity and moisture increase oxidation and lubricant breakdown.
  • Storing lubricants indoors. Outdoor storage can expose lubricants to more extreme and volatile conditions.
  • Storing lubricants in proper containers. Poor-quality steel containers can expose the oil to iron and fuel oxidation. Plastic or plastic-lined drums are ideal for storage.
  • Reduce agitation of the lubricant. The move the lubricant is agitated or moved, the more surface area of oil is exposed to air and can oxidize.
  • Evaluate usage and purchase lubricants accordingly. This smooths out spending, but also reduces the likelihood of using older products.
  • Practice First-In-First-Out (FIFO) when using lubricants. This prevents lubricants from sitting and aging.
  • Label lubricants, containers, and machines. Knowing when a lubricant was made or put into use allows individuals to be more mindful of when to change lubricants.

How do I Get Informed?

Unfortunately, there is no industry consensus on shelf-life. Following the tips above will extend and maintain shelf-life. Speaking with manufacturers, distributors, and engineers is the best option in getting product-specific shelf-life information. Manufacturers will know exactly what goes into their products and can provide shelf-life information and best practices for storage.

Twin Specialties can provide information about Best Practices for Lubricant Storage and Managing Metalworking Fluids. We work with manufacturers to provide transparency and information about lubricant shelf-life and usage. Contact Twin Specialties for information about lubricants, best practices, and shelf-life.

How to Manage your Metalworking Fluids

Metalworking fluids may not contribute that much to your manufacturing costs, but when fluids begin to fail or not work as intended, the costs could be astronomical. With the increasing costs of more technological fluids and rising disposal costs, managing your fluid and fluid consumption is more important than ever. Managing your fluids and dedicating a fluid management program could pay dividends by: reducing fluid usage, extending tool life, and improving manufacturing performance.

Monitoring Concentration

Fluid technology has advanced by leaps and bounds over the years and have improved performance for manufacturers. However, these advanced fluids have been engineered to work at specific concentrations. Running a coolant too thin or too rich will limit its ability to do its job. Running a coolant too rich might cause problems of over lubricity, but the main problem is overconsumption of the fluid.

The big problems occur when a fluid is too thin. This means the concentration in the sump is below the manufacturer’s recommendation. The additive packages are designed based on these minimum concentrations and provide enough of each additive to perform its function properly. Less concentrate means fewer biocides, fewer rust inhibitors, fewer emulsion stabilizers, etc. Eventually, the fluid breaks down quicker requiring more frequent change-outs. Some managing fluids, some operators use coolant additives/boosts to improve performance. If you vigilantly monitor concentration, the need for additives will lessen and thus reduce costs.

To monitor concentration, use a refractometer to measure concentration frequently. It is recommended to measure concentration every day or twice a day (depending on your operating schedule). The same person should measure to ensure consistency and ensure reliable measurements. When charging or recharging sumps, using automatic mixers helps ensure concentration is consistent. Remember, do not add just coolant or just water to the sump to balance out concentration. Some facilities use digital coolant monitoring systems to manage concentration, pH, and other factors. Facilities with large coolant systems may benefit from the technology.

Assessing Water Quality

Water comprises 90% or more of the fluid in the sump, thus it is crucial to make sure you are using good water. A common problem is hard water. The ions in hard water can cause chemical instability and increase the likelihood for emulsion splitting. Testing and treating your water is recommended to make sure your sump mix is working as intended. Twin Specialties can test samples of your tap water to ensure it is suitable for use in your metalworking fluid. If your tap water is excessively hard, installing a de-ionized water line is recommended for your facility. Coolant mixers can be connected directly to these lines to ensure proper mixing.

Once your water is deemed suitable, mixing the oil and water is all that is left in preparation. For the best performance and increased emulsion stability, follow the acronym O.I.L.: oil in last. This is an easy to remember acronym that will help you manually mix coolant; automatic mixers already mix using best practices.

Monitoring pH

Alkalinity is critical in the performance of your fluid. If the pH dips too low, it will no longer work and will need to be changed out. If pH drops below 8, it is imperative to raise it immediately. If pH drops below 7, the coolant is lost and must be changed. As the coolant gets more acidic (decreasing pH) you increase your risk of rusting problems. Some additives boost pH, but those may not be needed if you actively monitor your concentration. Monitoring is relatively easy, mix the fluid in the sump to get a more homogenized solution then dip a pH testing strip into the solution. Give the strip some time to change color and then match the strip to a reference sheet (usually provided with the strips). Then you can act accordingly armed with the pH information you need.

Tramp Oil Removal

Slideways and spindles require oil lubricants in order to function properly and ensure proper machining operations. These oil lubricants will leak into the sump and can cause havoc on your metalworking fluid. Some of the lubricant will be emulsified and disrupt the chemical composition of your metalworking fluid. The more oil content in the concentrate, the more likely the tramp oil will be emulsified.

This causes the growth of anaerobic bacteria. This bacterium creates hydrogen sulfide gas, which is the “rotten egg” or “Monday morning” smell that indicates coolant rancidity. The hydrogen sulfide in water also produces acids that drive down pH and alkalinity, which further damages coolant.

Synthetic coolants are excellent in rejecting tramp oils and prevent them from being emulsified. These floating oils can easily be skimmed and removed before causing damage. Using coolants below recommended concentrations limit the tramp oil rejecting additives and can accelerate this process of degradation.

Floating tramp oil can increase oil mist and smoke formation that can damage machines. The tramp oil mist also increases residues on the machine that can clog filters and destroy critical electronic components. Removing floating oil is relatively easy. Installing a skimmer, centrifuge, and/or coalescer will remove tramp oil from the sump and extend your coolants life.

Filtration

Metal fines and chips may find their way into the sump. It is important that they do not remain there and are not cycled through the machine. These fines can cause wear and damage to the machine and workpiece. The fines can build up and create dead-zones when additives are trapped and do not work. The trapped additives cannot work and lead to accelerated coolant breakdown.

Filtration used to be a cost-prohibitive endeavor, but the economics of coolant management and consumption make filters a worthwhile tool. The costs of filtration have come down and filtration technology has improved, thus implementing them will reduce coolant consumption and coolant spending.

Removing Foreign Substances from the Sump

Dirt and other foreign substances can cause problems such as abrasion and pump damage. Filtering solid substances and removing them will improve coolant performance. Sump cleaners might not be fully removed and can cause excessive foaming. If that happens, using a defoamer should alleviate these issues. However, be sure to properly remove the cleaner before recharging the sump. Prevention and proper preparation are usually the best maintenance.

Managing Straight Oil/Neat Oil

Neat oils require much less maintenance than water soluble coolants. This is because neat oils do not require water, which is a breeding ground for bacteria, fungi, and mold. However, there are still a few things that you should do to maintain and extend fluid life. The main thing should be done is filtering metal fines. Removing these metal fines improve finishing and fluid performance.

Takeaways

Given the rising costs and improving technology of metalworking fluids, it is more important than ever to proactively manage your fluids. This can lead to extended use intervals and improved performance. Following these steps will allow your machine to get the most out of these fluids.

Twin Specialties provides a full line of metalworking fluids and additives. Additionally, our sales team will work with you to test your fluids and water to troubleshoot the problem. Contact Twin Specialties for more information about our metalworking fluids, technical expertise, and our testing and sampling program.

How to Select the Right Grease

Selecting a grease or lubricant is one of the most crucial decisions you make in regards to any machine. Your selection might make the difference between cost savings, reduced downtime, or significant unexpected costs and failures. For oil lubricants, many OEMs specify what product or what type of product is recommended for each component of their equipment. This simplifies the selection process. However, OEM grease specifications are much broader. Most of the time OEMs simply recommend the National Lubrication Grease Institute (NLGI) specification.

This presents both flexibility and options, but also introduces more room erroneous decision-making and poor lubrication. Simply using the NLGI grade is not enough. You have to look at other factors to ensure you grease and machine work properly and does not fail. We will look at some key factors that every operator needs to consider.

Base Oil Viscosity

A grease is composed of 3 ingredients: thickener, oil, and additives. The NLGI number indicates the thickness of the thickener, but does not specify the viscosity of the thickened base oil. The underlying base oil has its own viscosity just like any lubrication oil. If a piece of a equipment calls for a certain lubricating oil with a specific viscosity, it is easy to find a grease that has the same base oil viscosity and similar additive package.

If viscosity requirements are not specified, you can use the chart below (courtesy of ExxonMobil and Noria).

The two factors required are operating temperature and DN or NDm, which are the bearing speed factors. To calculate those speed factors, simply use the following formula:

  • DN = (rpm)*(bearing bore) and
  • NDm = (rpm)*((bearing bore + outside diameter) / 2)

The intersection of DN and Temperature will point you towards the required ISO viscosity. This chart assumes viscosity index.

Base Oil Type and Additives

Once a viscosity is identified, you need to figure out what additives and base oil you need. Similar to oil lubricants you must assess your operations and figure what additives are necessary or unnecessary. For example, light loads and high-speed applications do not require a grease with extreme pressure (EP) additives, but a heavily loaded application will need those EP additives. The chart below breaks down the needed additives for various bearings.

Courtesy of Noria

Most greases use mineral oil and only require mineral oil. However, synthetic base oils are recommended for certain extreme temperature applications. Applications with low or high operating temperatures or a wide range of temperatures, a synthetic base oil is recommended. Synthetic base oil greases are also recommended for users who want to longer regreasing intervals.

Grease Thickener

Unlike lubricating oils, greases include thickeners. The two factors that distinguish grease are type and consistency. As mentioned earlier, consistency is based on the NLGI scale. The scale ranges from 000 (most fluid) to 6 (least fluid). The most common and most recommended NLGI grade is #2. Most OEMs specify the NLGI grade and matching that number is a simple process (especially if you require a NLGI 2 grease).

The other factor for thickeners is the type of thickener. The differences between each type of thickener are present pros and cons for each application. The most common types are lithium soap, lithium complex, and polyurea. Lithium soap greases are low-cost general-purpose grease and perform well in general applications. Lithium complex is similar to lithium soap, but is preferred for applications with higher operating temperatures. Polyurea greases have good high-temperature properties and have high oxidation stability and bleed resistance. When switching greases, it is important to understand thickener compatibility to make sure the new grease does not fail.

Cost and Other Considerations

When purchasing a grease, a basic lithium grease will be cheaper than a sophisticated polyurea grease. It is up to you to determine the tradeoffs between grease costs and performance gains/losses. Purchasing a higher quality grease may lead to longer regreasing intervals and less machine failure.

To save costs, consolidating greases may be wise, but be wary of over-consolidation. This may result in some machines not using an appropriate grease.

Other attributes should be considered depending on the application. Some grease exclusive attributes include:

  • Drop Point
  • Mechanical Stability
  • Water Washout
  • Bleed Characteristics
  • Pumpability

Certain attributes are focused specifically on heavy loads and should be considered for heavy load-low speed applications. These include:

  • Four-Ball Tests
  • Timken OK Load

Additionally, industry specific requirements will also dictate grease selection. These industries have strict requirements and require greases to be certified by certain 3rd-party regulators:

Conclusion

Unlike oils, greases have many more factors for product selection. These factors should be considered for each application as each grease is designed and manufacturer specifically for each application and have a delicate balance of thickener, oil, and additives.

Twin Specialties carries a wide variety of greases to meet you application needs. We work directly with you to make sure we provide the right product that delivers performance while being mindful of the total cost of grease and maintenance. Contact Twin Specialties to learn more about our grease product lines.

Used Oil vs. Waste Oil

The life of your oil-based lubricant does not end when it is time for a change. In fact, after draining a used lubricant, the oil will begin a new lifecycle thanks to advancements in recycling and recovery technology. 800 million of the 1.3 billion gallons of waste oil produced in the United States is recycled every year. To increase the amount of recyclable oil, manufacturers must collect and disposed of used and waste oil in safe, sustainable, and environmentally way. To achieve this, it is essential to follow best practices for used and waste oil management. However, there are key differences between “used oil” and “waste oil.”

Used Oil Defined

“Used oil” and “waste oil” are often used interchangeably, but the EPA defines them differently. The EPA defines used oil as:

“Used oil is any oil that has been refined from crude oil or any synthetic oil that has been used and as a result of such use is contaminated by physical or chemical impurities.”

This does not include any vegetable or animal-based oils. Simply, this is any petroleum or synthetic oil that has been used in operations and have reached the end of its service life.

Waste Oil Defined

Waste oil is much broader in its definition. Waste oil is “oil that has been contaminated with substances that may or may not be hazardous.” A lot of waste oil has not been used and was contaminated before use. A common example is a loose drum cap leaked and the oil mixed with water, rendering it unsuitable for use in lubrication.

Waste oil is considered a hazardous waste. In terms of regulations and compliance, that makes it a completely different product than “used oil.” That brings more liabilities and procedures needed to ensure it is handled properly. Additionally, used oil with certain additive mixtures and water can be classified as waste oil. Off-spec oils with exceeding amounts of arsenic (5 ppm), cadmium (2 ppm), chromium (10 ppm), lead (100 ppm) and halogens (> 4000 ppm) and a flash point above 100 F will also qualify as waste oil.

Best Practices for Storage and Removal

Even though the contents of waste oil may be similar to used oil, it is still classified as waste oil due to the method in which contamination occurred. Used oil is a by-product of doing business, thus allowable to be stored onsite. One mandatory practice for used oil is labelling the storage tanks correctly. Used oil tanks, drums, totes, containers, etc. must be labelled “Used Oil” in order to be in compliance with environment regulations.

By ensuring not cross-contamination, clearly label containers for waste oil and used oil. This prevents potentially spoiling non-hazardous used oil. Waste oil and used oil may be contain similar content mixes, but whether it is used makes all the difference. If an open or leaking drum is contaminated, it is considered waste oil as the contaminant is not known and not incurred during the course of operations.

One way to avoid accumulation of waste oil is ensuring storage best practices are maintained and the integrity of your drums and totes is maintained. If you store your oil near chemicals and solvents, potentially hazardous contamination can occur and proper waste oil procedures must take place. To save on handling costs of waste oil, consider a lubricant storage program and dedicate space for lubricants away from already-hazardous materials.

Learning from your Used Oil

Before dumping your used oil, it is advised to take a sample of the used oil and used oil filters. You can test the used oil and learn a lot about contamination and oil life. This can be a key part of your oil analysis program and help extend your service life and improve lubrication-related decision making and handling.

Key Takeaways

Proper planning and storage of unused lubricant will reduce the accumulation and likelihood of waste oil. Clearly labelling “Used Oil” and “Waste Oil” tanks will keep your facility in compliance and ensure used oil is not contaminated with hazardous materials. By using certified haulers, like Gemini Disposal Services, and recyclers more oil can be recycled and reduce harmful environmental activity like drilling and pipelines. For example, 1 gallon of used motor oil can provide the same 2.5 quarts of lubricating oil as 42 gallons of crude oil.

How to Monitor Alkaline Cleaning Tanks

After machining parts, manufacturers have to clean them. Once clean, the parts may be painted, assembled, or stored with a rust inhibitor coating. That makes cleaning crucial. Poor cleaning could lead to rust, uneven painting or failure in assembly. Many manufacturers do not have the time or budget to rapidly change out (1-day to 1-week intervals) cleaning tanks; if you are fortunate to have short intervals, little maintenance is required as there is limited time for problems to arise. However, you should still perform basic tests to ensure your cleaner is working properly.

For manufacturers with longer tank life, there are 2 main properties to monitor to ensure the performance of your alkaline cleaner: pH and concentration. When the pH and concentration change, the efficacy of the cleaners can decline and lead to more frequent change-outs and greater cleaner consumption. Basic monitoring can prove to be highly cost effective and extend tank life. 

pH Testing

The ability to remove soils declines as the cleaner’s pH drops. The recommended pH for cleaning non-aluminum parts is > 9.0 and > 9.5 for aluminum parts. Additionally, many corrosion inhibitors have a pH-dependent solubility curve. As the pH drops, less inhibitor is incorporated into the solution and the more likely corrosion on cleaned parts can occur. These inhibitors start to drop around 10.2 pH, but do not cause significant issues until the pH drops below 9.5.

Maintenance programs typically attempt to adjust the pH back into range after falling out rather than monitoring the pH for remaining in range. We recommend the latter method as this ensures the pH does not drop dangerously low and potentially renders the solution unusable. Trying to keep the pH between 9.5 (or higher) and 10.5 is ideal. Adding a caustic to boost pH could cause problems as you will get a false concentration reading. If you plan to adjust the pH, have a qualified on-site analytical chemist perform the adjustments.

To measure the pH, pull a sample of agitated solution and wait for it to cool to room temperature. Once cooled, use a narrow range pH strip to test the pH. Higher temperatures can render pH tests unreliable and measuring in the tank could capture the pH of contaminants on the strip.

Concentration Testing

The other key test involves testing the concentration using titration. Titration is used to find the tank strength (concentration). Titration involves adding an acidic reagent to a know volume of tank solution until a defined pH is reached. This can be done simply by adding drops of a reagent to the tank solution. This process involves a dye that changes colors at the defined pH endpoint. This is useful for finding the concentration with a +/- 2% tolerance.

This method is rather crude, but can be highly refined by having a trained chemist use lab equipment to run the test. Lab equipment is required for tests that require tighter tolerances than +/- 2%. Look for a constant concentration over time. If the concentration drops, some likely suspects are: cleaner carry-out, leaks, overly aggressive oil skimming, pH degradation by contaminants, and excessive raw material stripping. If the concentration increases, some likely suspects are: excessive add-back of cleaner or the presence of metalworking fluids. Sometimes soil could affect the strength reading and could indicate rising concentration or stable concentration when the strength is actually dropping.

Takeaways

The pH and concentration tests should be conducted each shift in the manner described above. Investing in lab equipment may prove worthwhile if you have stringent tolerances. If the concentration is too low, add some cleaner to put the solution in the proper range. If too high, add water to bring solution within the proper range. pH adjustment is not recommended unless you have a trained chemist on-site. For more information on cleaner management, contact Twin Specialties and ask about our “Coolant Management Guide” that includes tips and information for aqueous cleaners.

7 Steps for a Successful CNC Restart

After an extended production shutdown, it is imperative to get restarted quickly and efficiently. Maintaining your coolant can be the difference between success and failure. It is key to clean, refill (if necessary), and run according to the manufacturer’s recommendation.

These steps will depend on whether you emptied the sump before the shutdown. If you have emptied the coolant, ensure that the machine is cleaned out; Astro-Clean A can be used to clean the machine and remove and residual coolant and contamination in tough to reach places.

If your coolant remains in the sump after the shutdown, follow these steps for a successful restart:

  1. Inspect the coolant sump/tank for any problems.
    • Remove any tramp oil by using skimmers.
    • Remove any swarf or solids with filters or skimming nets.
    • If there are significant solids, the tank and machine should be cleaned out before proceeding.
  2. Do not add any coolant unless there is not enough to circulate through the machine. If you need to add coolant, add coolant at or above the target concentration.
  3. Circulate coolant through ALL pumps for 60 minutes to ensure all nozzles are flushed out.
  4. Check the concentration from the nozzle using a refractometer (either manual or digital).
  5. Top off the sump to 95% capacity to the target concentration + 2%.
  6. Check the pH and odor. Test the pH from the nozzle.
    • If it is too low (8-9 pH), add 3% volume of coolant and circulate for 30 minutes. Repeat until pH is acceptable.
    • If pH is below 8, the coolant is spent and must be replaced. Use Astro-Clean A to clean out machine.
  7. Add fresh coolant to bring tank/sump volume to 100%.

Bonus Tip: To keep coolant fresher during shutdowns, run skimmers and fish-tank fans to prevent tramp oil contamination and coolant breakdown. Circulating the sump coolant may reduce odor.

Following these steps will ensure a successful restart. Equally important is continuous monitoring of the sump/tank. One individual should check concentration daily and pH weekly. If something is off, act accordingly and quickly. Keep records in a coolant log for each machine to ensure continued success.

Contact Twin Specialties about our coolant guide for information about success coolant management. Twin Specialties has over 65 years of experience with metalworking fluids and is your go-to source for metalworking fluids, cleaners, and rust preventatives/inhibitors.

What is DEF?

DEF Defined & EPA Requirements

DEF, also known as Diesel Exhaust Fluid, is an aftertreatment fuel system liquid that is used in diesel engine vehicles to reduce air pollution. Specifically, DEF is designed to reduce the concentration and emission of nitrogen oxides (NOx), by converting nitrogen monoxide (NO) and nitrogen dioxide (NO2) molecules into:

  • Harmless nitrogen molecules, which are the most abundant in our atmosphere
  • Water
  • Carbon dioxide, which is harmless to humans, but still plays a role in climate change

By transforming harmful emissions into harmless gases, DEF plays a key role in reducing emissions over the past few decades. The 2010 EPA Emission Requirements for diesel engines are:

  • 0.2g/HP-hr of NOx
  • 0.1g/HP-hr Particylate Matter

Looking at the chart to the right, DEF has helped reduce emissions by 98% since the late 1980s. This has led to a cleaner environment with less “black” fuel exhaust. These results have made DEF and essential fluid for all diesel engine vehicles.

Ingredients & DEF Standards (ISO 22241)

Sometimes to solve complex problems, all you need is a simple solution. DEF is a simple product consisting of only 2 ingredients: urea and deionized water. With such a short ingredient list, why would it be tough to manufacture DEF? In order for DEF to work effectively and protect your engine and fuel system, DEF must be made with extremely pure urea and water. These purity requirements are clearly defined in ISO 22241, Diesel Engines – NOx Reduction Agent, Aqueous Urea Solution (AUS 32). Additionally, DEF products that meet ISO 22241 may be licensed to display the API DEF Certification.

What requirements are needed to meet the ISO 22241 standard? Each ingredient has the following requirements:

  • Technically Pure Urea with traces of biuret, ammonia, and water only. Urea that is free of aldehydes or other substances such as anticaking agents. The urea is to be free of contaminants such as sulfur, chloride, nitrate, or other compounds.
  • Water with very low inorganic, organic, or colloidal contaminants. This is achieved by single distillation, deionization, ultra-filtration, or reverse osmosis.

Using these purified ingredients, DEF must have a urea concentration of 32.5%. This ensures that enough urea is present to convert the NOx and ensures reliable operation of the selective catalytic reduction (SCR) systems. It is also the concentration that produces the lowest freezing temperature of 12 F. If the fluid does not meet these ISO 22241 standards, it cannot be classified or called a diesel exhaust fluid.

How does it Work?

Now that we have found the fluids needed to convert the NOx, we need the technology and equipment to catalyze those chemical reactions. The most common systems used are Selective Catalytic Reduction systems (SCR). The SCR allows the following chemical reaction to occur:

  1. Water evaporates and urea decomposes into ammonia and isocyanic acid
  2. Isocyanic acid reacts with the water vapor and hydrolyzes into carbon dioxide and more ammonia
  3. In the presence of oxygen and a catalyst, ammonia reduces NOx into nitrogen and water

SCRs have proven to be the most effective solution in reducing NOx emissions. SCRs are the only solution that curbs emissions without compromising fuel efficiency and engine performance. As an aftertreatment system, a system that does not work within the engine, SCRs allow engineers to tune engines that can help performance and efficiency. All diesel vehicles produced today have some sort of SCR built in.

SCRs also have safeguards in place to ensure a diesel engine is not operating without a proper amount of DEF. Many vehicles have warning systems to warn operators to refill their DEF tanks. If those fail, engines will shut down and will not engage until there is a sufficient amount of DEF in the tank to reduce any NOx produced by the engine. It is important for operators to monitor the DEF tank just like they would their fuel tank.

Benefits and Costs of DEF

With increased fuel efficiency, many fleets are noticing around a 5% fuel savings compared to older models. Off-road vehicles and equipment that use SCRs and DEF can see fuel savings well beyond 5%. With large fleets, that 5% can add up significantly over many vehicles and miles.

The DEF needed to properly reduce NOx is generally 2-6% of a vehicles fuel consumption (e.g. 2-6 gallons of DEF needed for every 100 gallons of diesel fuel consumed). To figure out your DEF needs, simply determine: miles driven by your vehicle, miles per gallon (MPG), and DEF dosing rate (2-6%). By dividing miles driven by the MPG, you find your fuel consumption. Multiply your fuel consumption by the dosing rate to get your required DEF volume.

The cost of the DEF is the only extra cost to SCR systems, but those costs can easily be offset (and then some) with the 5% fuel savings. The weight of a full DEF tank is only 5-9 lbs., which is negligible in large commercial vehicles. In passenger cars with diesel engines, typically you need to fill your DEF tank at each oil change. Fortunately, a 2.5-gallon container of DEF can be found for under $20 at most retailers.

Storing and Handling DEF

DEF has a freezing/crystallization point of 12 F. As DEF freezes into a crystalline slush, its volume can expand as much as 7%. Many vehicles have heating elements that ensure in-tank DEF does not freeze or threaten vehicle failure. Freezing does not affect the efficacy of the product, but it is important to store it in tanks at appropriate temperatures.

The shelf life of DEF is about 1-2 years, but could be reduced if the fluid is exposed to direct sunlight or stored at temperatures above 86 F. The water can evaporate in tanks, so it is important to keep the tanks sealed and at an ambient temperature around 75 F. If the fluid evaporates, do not add your own mixture as that can upset the precise chemical balance of manufactured DEF.

Where to get DEF

For commercial fleets and clients, speak with a distributor about solutions and certified products. Twin Specialties offers DEF in drums, totes, and bulk. Additionally, we can work with certain businesses interested in buying larger amounts of retail/consumer-packaged DEF products. Individuals who drive a diesel-engine vehicle can purchase bottles or DEF at gas stations, hardware stores, or auto shops. As diesel-engine vehicles become more popular, especially in Europe, many gas stations are adding AdBlue pumps where drivers can pump DEF directly in their car from the pump for cost savings.

Lubricants for Cold Weather

During the winter months and in cold weather regions, operators will face cold starts regularly and must select lubricants that ensure proper performance and protect your machine or engine. We will focus on key features that will differentiate lubricants that excel in cold weather and lubricants that will lead to machine or engine failure.

Viscosity

Not all cold starts are equal. There are varying temperatures and the lubricant you need will depend on the ambient temperature. If temperatures are below -20 C/- 4 F, it is recommended to use base oils that can flow in low temperatures. For engine oils, using an SAE 0W or SAW 5W grade lubricant is recommended. When the temperature drops below -30 C/- 22 F, operators should use a SAE 0W or SAE 5W lubricant, but whose base oil is a synthetic base stock and/or a base oil that is considered “multi-grade” or “multi-viscosity.”

Many of these multi-viscosity and multi-grade lubricants are designed for extreme weather conditions including cold start conditions. These lubricants maintain their viscosity better than conventional lubricants. Generally, multi-viscosity lubricants exhibit viscosity characteristics found in 2 different ISO viscosity grades (i.e. ISO 32-46) and multi-grade lubricants exhibit viscosity characteristics found in 3 different ISO viscosity grades (i.e. ISO 32-46-68).

Viscosity Index

When the temperature drops, the lubricant becomes more viscous, thus making it more difficult to circulate and flow through the engine or machine. Having a lubricant with a high viscosity index, defined as a viscosity index greater than 130, ensures that your lubricant better maintains its viscosity in extreme temperatures. Lubricants with high viscosity indices have either a highly refined or synthetic base stock or include viscosity index improver additives.

Monograde lubricants will have viscosity indices in the 95-105 range and will not perform as well as in cold start conditions. Many operators will use different monograde lubricants depending on the ambient temperature. This may cause issues with change outs and cold temperature properties.

Pour Point

As mentioned earlier, not all cold starts are created equal. In colder temperatures, a lubricant’s pour point could be the difference between success and failure. Pour point is defined as when a lubricant no longer flows and congeals. When operating in temperatures below -30 C/-22 F, it is imperative to use a lubricant with a pour point lower than -50 C/-58 F. Similar to viscosity index, lubricants with highly refined or synthetic base stocks have lower pour points. Some lubricants are manufactured with pour point depressants that prevent wax formation and the congealing of the lubricant.

Oil Integrity and Storage

While you can meticulously select the perfect lubricant based on your OEM requirements, ambient climate, and budget, it could be costly if you do not maintain it properly. Just like any oil, it is important to regularly check the oil for cleanliness and contamination. Taking regular samples is key to ensure your lubricant and machine is in good health. When storing lubricants. It is helpful to store the lubricant indoors or in a warmer environment so that it flows easily during start-up. Proper storage will also protect against contamination. If contaminated, the additives such as VI improvers or pour point depressants may not be as effective and could hurt lubricant performance.

How to Get Rid of Microbes in Your Sump

Bacteria or Fungus in the Machine Sump

At some point, your metalworking fluid will go bad. Hopefully, in most cases it has ran through its effective life and can safely be removed or recharged with a fresh batch. However, sometimes a fluid’s life will be cut short due to unforeseen circumstances. This may involve machine leaks, breakdowns, or outside contamination. In some instances, your fluid and machine may be filled with bacteria or fungus. When this happens, it is imperative to stop operations and remove all fluid from the sump to prevent any further issues.

If there is any remaining contaminated fluid still in the machine, it will decrease the life and effectiveness of the new charge as the fungus and bacteria will continue to thrive in the existing fluid. It is best to also run a cleaner through the machine to help clean hard-to-reach areas such as pumps and hoses. In addition to cleaning out the contaminated fluid, the cleaner removes process oils, gummy deposits or oil, grease, swarf and other outside contaminants. Monroe Fluid Technology’s Astro-Clean A contains special additives designed to render the machine neutral of bacteria and fungus.

Bacteria and fungi grow in the presence of increased surface area in a fluid. As more bacteria and fungus are in the machine, the faster the growth. This exponential growth problem can wreak havoc on your machine and lead to serious problems. That is why it is important to be proactive in managing your fluid. This will lead to reduced down time and increased performance. The main component of fluid maintenance is following the manufacturers recommended concentration and regularly checking the fluid and adding any additives necessary to maintain the highest performance.

Biocides and Metalworking Fluid Additives

One key additive is biocide. Biocides are designed to kill bacteria, fungus, and other living microbes that will damage the fluid. These additives can simply be added to any sump or central system. Grotan is designed specifically for metalworking fluids to extend fluid life. Grotan is meant to be added at 0.15% (1500 ppm) and will fight bacteria and fungus. Many products are formulated with a biocide, like Grotan, to help protect machinery, tools, and work pieces.

Metalworking fluids with biocides are constructed with recommended concentrations in mind. This matters when a machine may be running “lean” on a fluid. If the manufacturer calls for 4%, but the machine is running at 2%, the machine only has half as much additives as needed. There must be a minimum level of biocide present in a solution in order for it to be effective. If there is not enough biocide, the bacteria will not disappear and slowly but surely repopulate. Therefore, it is imperative to follow manufacturer guidelines to enough there is enough biocide and other additives in your solution.

To ensure proper performance, it is important to regularly check the concentration of the solution to ensure the product performs as expected. Using refractometers to measure the Brix/concentration is crucial in maintaining an aqueous solution. This allows users to see the exact concentration and make adjustments as necessary. It is recommended to record the concentration level daily. Due to water evaporation, it is important to add concentrate to your sump to maintain recommended concentration. Never add just water or concentrate, it is recommended to add both to maintain the sump for longer tool life. Mixers are recommended to ensure consistent refills and measurements.

Cleaning Best Practices

It is also important to hand-wash/hand-wipe reachable areas of the machine to remove any solids from the sump. If these solids are not removed, it can result in continued growth of fungus or bacteria. Fungus typically grows by attaching itself to a solid in the sump or system. Theses solids may be outside contamination or smaller clusters of fungus. Therefore, it is crucial to remove solids and deposits before AND after running a cleaning solution through your machine.

If you are unable to dedicate a time to clean and service the machine, the cleaner can be added to the metalworking fluid solution at a concentration of 1-3%. This allows for cleaning while machining parts. Build-up will release from the machine as production continues. It is important to remove these residues and solids after the system is drained. As new fluid flows through the machine after recharging, some deposits may dislodge and appear in the sump. This is normal and should occur during the first week of a new charge.

Contamination that Grows Bacteria and Fungus

In addition to using a cleaner after draining the sump, it is important to follow fluid maintenance best practices. For example, it is recommended to have some method of skimming tramp oil. This can be done by hand or by having an oil skimmer installed in your tank or sump. When tramp oil gets into the mixture, contaminants from the oil can become “food” for bacteria. The tramp oil will also sit on the top of the sump and provide a “seal” which will allow anaerobic bacteria to thrive and multiply. This results in rancidity, which can create less than ideal work environments.

Sometimes outside contaminants can get into the sump and can create surface areas for bacteria and fungus to attach themselves and grow. This build-up can lead to dead zones in the machine where fluid flow is limited or halted completely. It is important to have mechanisms in place to regularly remove solids from the sump. Some examples of tools include: magnetic wheels, conveyors, and indexable filters. In the case of fungi, the fungal mass will remain in the system since it will not disintegrate in the fluid. Therefore, it is important to remove any fungal mass to prevent future growth. Having these items in the machine allow for solid removal and higher performing fluids.

Twin Specialties Can Help

If your sump is filled with harmful microbes, we are here to help. Twin Specialties has a variety of products and resources available to help get rid of microbes. We offer cleaners and biocides that can be incorporated into your sump and metalworking fluids. Contact us for a coolant management guide, a site visit, or fluid testing. We can discuss how to fix your sump and establish practices to uphold the integrity of your metalworking fluids.

6 Tips for Disposing of Liquid Waste

Getting rid of waste, particularly liquid waste, is not at the top of your to-do list.  Understandably, the waste generated by many of the manufacturing and machining processes gets in the way, and can be annoying and costly of which to dispose. Here are some simple best practices that most all generators should follow.

  1.  Become Informed – Learn about the contents and characteristics of your waste stream.  Quite often, the person in charge of waste stream management has not been properly educated or trained about the waste.  It’s not uncommon for many health and safety responsibilities to fall upon a team member that is already deluged with other responsibilities at the facility.  However, not knowing the laws and responsibilities regarding your waste stream has consistently not been an acceptable answer when confronted with the relevant government agencies.  Safe to say, you could be breaking the law and not even know it.  Educate yourself!
  2. Separate Your Waste – When storing liquid waste, be sure to segregate each waste stream.  Quite often the cost of a waste stream is determined by the way the waste has to be treated at a recycling facility.   Safe to say, hazardous waste is usually more costly than non-hazardous waste streams.  If you co-mingle the streams, you risk the possibility of costing yourself more money and potentially creating a substance or material that is much more flammable and combustible.
  3. Take Precautions – When transferring waste, take extra precautions for make sure the transfer is done safely.  This is often when most accidents occur – when moving the waste from a tank to a drum, for example.
  4. Isolate Waste Containers – Obviously, you want to store your waste in a secure, safe area.  Pick a low-traffic area, if possible.
  5. Label, Label, Label – Make sure when you take the time to implement a safe handling of your waste that you properly label all drums, tanks, pallets, etc. The waste hauler and processor will know which waste stream is which. This will allow for a smoother and safer removal and disposal process.
  6. Do not Delay – Dispose of waste in a timely manner.  This action step could certainly be #1 on our list.  Best practices suggest that you not store hazardous and non-hazardous waste at your facility for more than six months.  However, consult your local and state authorities for the specifics of your waste stream.

A great place to start researching is the EPA or DEP. These sites have plenty of information on the latest rules and regulations regarding your waste. If you have any questions, Gemini Disposal Services can help answer questions on your liquid waste streams. If you are looking to dispose of your liquid waste, request a quote and we will help you manage your liquid waste.