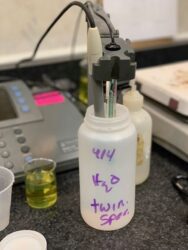
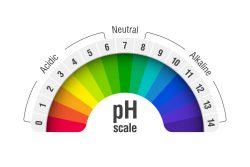
How to Monitor Alkaline Cleaning Tanks

After machining parts, manufacturers have to clean them. Once clean, the parts may be painted, assembled, or stored with a rust inhibitor coating. That makes cleaning crucial. Poor cleaning could lead to rust, uneven painting or failure in assembly. Many manufacturers do not have the time or budget to rapidly change out (1-day to 1-week intervals) cleaning tanks; if you are fortunate to have short intervals, little maintenance is required as there is limited time for problems to arise. However, you should still perform basic tests to ensure your cleaner is working properly.

For manufacturers with longer tank life, there are 2 main properties to monitor to ensure the performance of your alkaline cleaner: pH and concentration. When the pH and concentration change, the efficacy of the cleaners can decline and lead to more frequent change-outs and greater cleaner consumption. Basic monitoring can prove to be highly cost effective and extend tank life. 

pH Testing

The ability to remove soils declines as the cleaner’s pH drops. The recommended pH for cleaning non-aluminum parts is > 9.0 and > 9.5 for aluminum parts. Additionally, many corrosion inhibitors have a pH-dependent solubility curve. As the pH drops, less inhibitor is incorporated into the solution and the more likely corrosion on cleaned parts can occur. These inhibitors start to drop around 10.2 pH, but do not cause significant issues until the pH drops below 9.5.

Maintenance programs typically attempt to adjust the pH back into range after falling out rather than monitoring the pH for remaining in range. We recommend the latter method as this ensures the pH does not drop dangerously low and potentially renders the solution unusable. Trying to keep the pH between 9.5 (or higher) and 10.5 is ideal. Adding a caustic to boost pH could cause problems as you will get a false concentration reading. If you plan to adjust the pH, have a qualified on-site analytical chemist perform the adjustments.

To measure the pH, pull a sample of agitated solution and wait for it to cool to room temperature. Once cooled, use a narrow range pH strip to test the pH. Higher temperatures can render pH tests unreliable and measuring in the tank could capture the pH of contaminants on the strip.

Concentration Testing

The other key test involves testing the concentration using titration. Titration is used to find the tank strength (concentration). Titration involves adding an acidic reagent to a know volume of tank solution until a defined pH is reached. This can be done simply by adding drops of a reagent to the tank solution. This process involves a dye that changes colors at the defined pH endpoint. This is useful for finding the concentration with a +/- 2% tolerance.

This method is rather crude, but can be highly refined by having a trained chemist use lab equipment to run the test. Lab equipment is required for tests that require tighter tolerances than +/- 2%. Look for a constant concentration over time. If the concentration drops, some likely suspects are: cleaner carry-out, leaks, overly aggressive oil skimming, pH degradation by contaminants, and excessive raw material stripping. If the concentration increases, some likely suspects are: excessive add-back of cleaner or the presence of metalworking fluids. Sometimes soil could affect the strength reading and could indicate rising concentration or stable concentration when the strength is actually dropping.

Takeaways

The pH and concentration tests should be conducted each shift in the manner described above. Investing in lab equipment may prove worthwhile if you have stringent tolerances. If the concentration is too low, add some cleaner to put the solution in the proper range. If too high, add water to bring solution within the proper range. pH adjustment is not recommended unless you have a trained chemist on-site. For more information on cleaner management, contact Twin Specialties and ask about our “Coolant Management Guide” that includes tips and information for aqueous cleaners.

How to Test Fluid Samples

You have pondered switching your metalworking fluid. Whether it is a soluble oil, straight oil or synthetic, it is crucial to give your sample a fair test. Many times a superior product may test worse than its inferior equivalent due to a poor testing environment. There are many factors to consider when setting up the testing environment, as well as how you are going to test the sample.

Prepare the Testing Environment

Once you have established a time to test new fluids, it is important to include time to prepare the environment. In scientific experiments, scientists meticulously craft the environment to get controlled and accurate results, the same should apply to your fluid test. Depending on your process, preparation may involve: draining the sump, wiping down parts, running a cleaner through the machine, or changing your tools. It is important to have a fresh and consistent environment as you will reduce the amount of variables that may affect performance.

Determine Testing Metrics

Firstly, you and your team should determine what is going to be monitored. It is best to use a typical process for a given machine. The results will give better insight if you are machining a component that you regularly make. If you are testing a heavy-duty product, using a complex process will allow you to observe the sample in tougher conditions. You can test for a variety of quantitative and/or qualitative factors such as: foaming, evaporation rate, performance and residual film. Whatever you want to monitor and improve, setting clear goals will aid your analysis.

Run a Baseline Test

Secondly, run a test on the current fluid. Ensure that the fluid is fresh and the machine is in proper working order. On occasion, a fluid may perform poorly because it has not been maintained properly or incorrectly used. Consult technical data sheets to determine best practices for the fluid. Sometimes, your issue be resolved if proper usage and maintenance are practiced. Measure your results and then reset the testing environment for the sample(s).

Sample Testing and Decision-Making

Finally, test your sample(s) with the exact same process as your baseline test for an accurate comparison. It is important to prepare the testing environment to the conditions best suited for the sample. Consult technical data sheets for determining proper concentration and operating conditions. These conditions may differ from the baseline test and differ among different samples. Once complete, you can compare the results of the sample test and the baseline test and determine which product is the best.

Once the testing is complete, you and your team should compare the results of the sample(s) against the baseline and make a decision on which fluid to use going forward. It is important to consider other business and economic factors as well. Things like price, lead time and availability are also important as these could impact the bottom line and productivity.

Post-Decision Considerations

After a final decision has been made, it is important to set up a proper operating environment going forward. Set up new operating procedures to produce a consistent operating environment and communicate the changes with your team and machine operators. This ensures maximum performance of the fluid and reduces the likelihood of having to switch and go through the testing process again. If a switch is made, you must figure what to do with the remaining fluid left at your facility; some options include: using up the remaining fluid, reselling or returning the fluid, or disposing of the fluid with an environment services company.